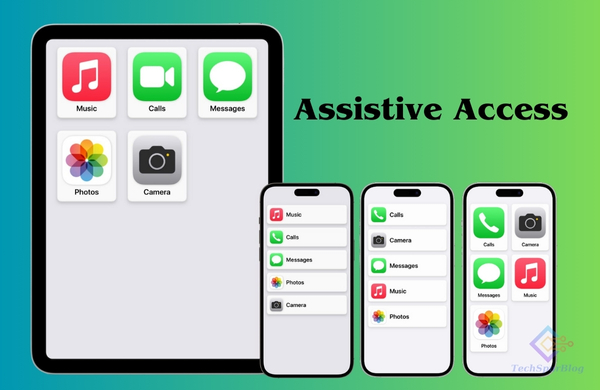
Creating an inclusive digital experience has been at the forefront of Apple’s mission, and with the introduction of iOS 17 and iPad OS 17, Assistive Access emerges as a groundbreaking feature. This innovative tool aims to provide tailored app experiences, offering users a chance to streamline their choices and alleviate cognitive loads for a more personalized interaction with their devices.
Customization for Individual Needs
Assistive Access offers a platform for trusted supporters to cater specifically to users with unique requirements. To initiate the setup process, a few preliminary steps are essential. The trusted supporter, guided through the initial setup, establishes a passcode dedicated solely to Assistive Access. Additionally, having the Apple ID and password on hand serves as a backup exit method if the passcode is forgotten.
Also Read: Offline Maps in iOS 17: Accessing Directions and Information without Internet
Setting Up Assistive Access
Getting started with Assistive Access involves a series of straightforward steps. Navigating through Settings, tapping on Accessibility, and scrolling down to Assistive Access initiates the setup process. Ensuring the user’s Apple ID is signed in is crucial, but if not, a simple tap on “Change Apple ID” facilitates the process.
Tailoring the Experience
The flexibility offered by Assistive Access shines through in its ability to customize text and app icons. Users can choose between rows for text-centric preferences or a grid layout catering to visual inclinations. Moreover, selecting and optimizing specific apps within Assistive Access becomes seamless with the “Add” button, enabling a consistent interface for various applications.
Customizing App Features
The customization doesn’t stop at app selection. For instance, configuring the “Calls” app allows users to set preferences for receiving calls—whether from anyone or selected contacts. The process involves selecting contacts and specifying call options, accommodating both audio and video calls seamlessly within the app.
Additional Settings and Features
Apart from apps tailored explicitly for Assistive Access, users can integrate any installed app, ensuring a consistent back button for easy navigation back to the Home Screen. Additional settings within Assistive Access include personalization options like changing wallpapers and displaying time on the Lock Screen, allowing for a more engaging and user-friendly experience.
Also Read: How to Use Check In on iOS 17 to Keep Loved Ones Informed
Entering Assistive Access Mode
Once the setup is complete, accessing Assistive Access is simple. Users can initiate it by navigating through Settings, tapping on Accessibility, and selecting Assistive Access. Entering the dedicated passcode designed for Assistive Access activates the mode, providing users with a streamlined, consistent interface across various applications.
Enhanced User Experience
Assistive Access grants users a more focused and streamlined interaction with their iPhone or iPad. A consistent back button in every app ensures easy navigation, empowering users to concentrate on activities they cherish most, without the distractions of complex interfaces or convoluted navigation.
In a digital landscape that constantly evolves, Apple’s Assistive Access stands as a testament to the company’s dedication to accessibility. By providing customizable, user-centric experiences, it opens doors for a more inclusive and empowering technological future.

Leave a Reply